Cameras and Quality Iris Images
There are three different types of cameras can be used to photograph your eyes, along with 2 other options. All these methods utilize digital devices.
3 Types of Cameras
- Smart Phone
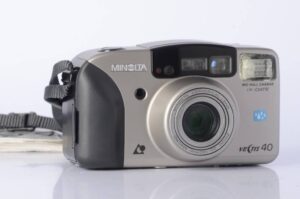
- Point and Shoot
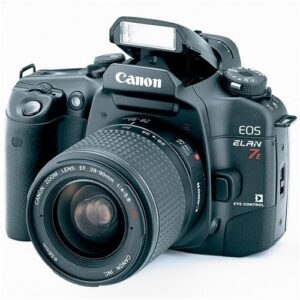
- Single Lens Reflex (SLR)
2 Options
- Professional Photographer/Iridologist
- Ophthalmologist
How to Take Good Eye Pictures
Eyes are challenging to photograph because they are round, the eyelids get in the way, we must get close, and they are wet, reflecting light. The greatest challenge to overcome is getting good focused images with no part of the eyelid covering the iris, (colored portion).
Important Points to Consider:
- To get a good iris reading, it is important to get a good crisp image of both eyes, shooting each iris separately
- The better the camera the clearer the image, so you might have a friend with a good one if you don’t
- Even the best camera depends on having no movement after the camera finishes focusing, and zoom in until you see the detail in the iris
- You must make sure that there are no bright lights in your field of view, or you will see a reflection in your eye. You can turn the lights down and use a flashlight if you need light to focus. Most times the camera will have some illumination prior to the shot.
- If possible, you will want to use a tripod to keep the camera steady or sit at a table, so you don’t move during the shot
- Mostly it will be trial and error to get a good shot, so take a bunch of pictures, have a friend help, and have a lot of fun getting the perfect shot.
- Before taking a picture, sit in front of the person, ask them to cover one eye with a hand. Ask them to look straight at you. Have them put a finger below the open eye and gently pull down the lower eye lid to expose the iris. Make sure they are looking straight at you and straight on. Then say “raise your eyebrows like you are surprised” – this will expose the upper part of the iris. Play with tilting the head back to see the top of the eye better. When you can see a fully exposed iris then rest, do it again and take the picture.
Smart Phone
Unfortunately, the most difficult way to get good iris pictures is with a smart phone. Getting good focused images requires no movement from the subject or camera.

Smart Phone Settings
- You must have a minimum 10 mega pixel camera.
- Set your camera to highest resolution/pixels.
- If you have a HDR setting, turn it on.
- If you have a macro setting, turn it on.
- Turn flash on.
- If your phone has a HDR setting, turn it on.
- Set your camera up to use voice commands to take a picture. If you do not have a voice command function, use the 2 second timer.
- Find the focal length. This is the closest you can get to the eye and still have the camera focus. To find the focal length of your phone focus on something close. See how close you and get and keep focus. Freeze that position and hold and measure the distance from the table to the camera. This is your focal length. Cut a paper towel or toilet paper roll to this length. Use it as a spacer against your cheek for your camera positioning.
- Do not use the selfie camera the one on the screen side, use the camera for taking normal pictures, on the back of the phone.
- The goal in this step is to get as close as you can to the eye and still get a focused image. To find the closest distance, hold your phone up close to an object, see how close you can get while the camera remains focused. This is the distance you want to hold the camera when taking pictures your own eyes.
Options
- Stand in front of a mirror, put your fist against your cheek and rest the phone on your fist. Use the mirror to center your eye in the picture. Make sure your eye is fully open, so the eyelid does not cover the iris or colored portion of your eye. Take the picture using the voice command.
- If you have a second person, they can center the camera in your eye. In this case, stand against a wall or sit in a chair using back support. Fist against cheek, phone is on fist. Use voice to take picture.
- Using a tripod. Secure the camera to the tripod using black electrical tape or rubber band. Stand against wall, position tripod, use voice command to take picture.
Point and Shoot Camera- Must Have Macro Setting
- Cover about 2/3 to ¾ of the flash with black electrical tape to reduce the amount of light from the flash.
- Set the camera on the Macro setting.
- Set camera on highest resolution.
- Sit at a table either at the corner or on the same side. Both people put elbows on table. Open eye pulling eyelids apart. Person taking pictures rest hand on cheek of subject rest camera on hand shoot image. For better lighting, you can hold a small flashlight at the side of the eye.
35 mm SLR Camera
- Set camera to highest resolution.
- Pop flash is usually ok try different modes for good picture.
- Set camera on tripod, zoom in if necessary.
- Sit at table.
- With a second person, you can try hand holding the camera. If the images are out of focus they likely problem is camera movement.
- Try using manual setting, try using auto setting to see which pictures are best.
Professional Photographer
- Use an 80mm or 105mm macro lens.
- A ring flash will work
- They are the professional, make sure to keep the eyelids from covering the iris or colored part of the eye.
Medical Eye Doctor, Ophthalmologist
They are accustomed to taking pictures of the retina.
Take in a good iris photograph from our website and show them the kind of image you want.


